Let’s get a quick overview of Amazon API Gateway from an AWS certification perspective. We will look at important certification questions regarding Amazon API Gateway.
AWS CloudFormation
Greetings from in28minutes.com. In this read, we will take a good look at the AWS CloudFormation (CF) and understand the practical implementation of playing around EC2 with CloudFormation scripts.
What is AWS CloudFormation (CF)?
AWS CloudFormation is a free-to-use Infrastructure as a Service (i.e. Pay only for the resources) that helps developers and businesses to easily create the AWS resources and provision them in an orderly and predictable way.
- Provides a common language to describe and provision the AWS resources required for your infrastructure
- The configuration is defined in the simple JSON or YML file
- Understand the cloud dependencies i.e. It will first create a VPC, then subnets and later the resources in that subnet
- Offers functionality like -
- Automatic rollback on errors (i.e. If the resource creation is failed, it would automatically delete the subnet and the VPC)
- Version control the configuration file
Concepts
| Element | Description |
|---|---|
| Templates | The JSON or the YAML file that consists of the instructions for building the AWS resources in the cloud environment. <ul><li>Developers can also use the CloudFromation Designer tool for creating, viewing, or modifying the templates</li></ul> |
| Stacks | Stack is a single unit describe by the Template and is created, updated, and deleted as when required. <ul><li>If the resource creation gets failed, CloudFormation automatically rolls back the Stack and deletes the created resources</li><li>If the resource cannot be deleted, it is retained until the stack can be deleted successfully</ul> |
| Stack Sets | Allows to roll out the CloudFormation stacks over the multiple AWS accounts and in multiple regions with just a few clicks. <ul><li>We can also specify the key and value pairs (popularly called as tags) during the Stack set create and update operations</li></ul> |
| Change Sets | It is a summary of the changes that are proposed to the Stack and will allow the users to verify the impact that will be propagated to the existing cloud environment |
Advantages
- Offers automatic deployment and modification of AWS resources in an orderly and predictable way
- Avoids the manual configuration mistakes and configuration drift
- Configuration Drift enables you to detect whether a Stack’s actual configuration differs, or has drifted, from its expected configuration
- Versioning the environment
Monitoring
- Since AWS provides effective monitoring for almost each of their services so in here we have the AWS CloudTrail (CT) which provides a detail of the action taken by a user, role, or an AWS service.
- CT captures the API calls for CloudFormation service as events
Security
- CloudFormation activities such as Create Stack, View Stack templates, or delete stacks can be controlled through IAM
- CloudFormation can use the IAM service role to make calls to the resources in a stack on your behalf
Limits
| Limit | Description | Value |
|---|---|---|
| Resources | Maximum number of resources that can be configured in the configuration file | 200 |
| Stacks | Maximum number of stacks that can be created | 200 |
| StackSets | Maximum number of stack sets that can be created in an administrator account | 100 |
| Stack instances per Stack set | The number of stack instances we can have in an individual stack step | 200 |
How CloudFormation is different from Elastic Beanstalk?
| CloudFormation | Elastic Beanstalk |
|---|---|
| Template-driven provisioning | Web applications made easy |
| Infrastructure deployment using code | Deploy applications through platform as a service |
| Can deploy the Elastic Beanstalk environments | Cannot deploy the CloudFormation blueprint |
| Use JSON or YML files | Use ZIP or WAR files |
| Similar to Terraform | Simiar to Google App Engine |
CloudFormation Practical Implementation
To keep it simple we will first see how to create a provision a simple EC2 (populary known as Hello World in CF world) through the CF script.
Provision a first EC2 instance
To provision a first EC2 we first need to create basic YML configuration file. Before we go ahead and create the configuration let me guide through the minimum steps required to create an EC2 instance.
- Determine the Image id (such as Linux, Windows, etc.), Type of instance (such as t2.nano, t2.micro, etc.)
- Identity the Security Group(s) that needs to be attached to the EC2 instance (such as port number
80for Webserver,22for SSH operations, etc.)- While identifying the Security Group we also determine the CIDR block (such as
0.0.0.0/0or anything specfic range) - If using port number
22, we identify the key-pair that needs to be assigned to the EC2 for login purpose
- While identifying the Security Group we also determine the CIDR block (such as
- Determine the tags that you would like to assign to your instance
- And any optional configuration (such as adding user data to the webserver, etc)
Once we have all this information in place we can start writing our first configuration file to provision an EC2 instance.
Creating the YML configuration
In this simple example we’ll provision an EC2 instance -
- Assign it a Webserver Security Group
- Add some Webserver user data information to the EC2 instance
Description: Creating ec2 instance with a webserver using aws cloudformation
Resources:
	MyEC2WebserverSecurityGroup:
		Type: AWS::EC2::SecurityGroup
		Properties:
			GroupDescription: Open port number 80 for httpd webserver
			SecurityGroupIngress:
			- IpProtocol: tcp
			  FromPort: '80'
			  ToPort: '80'
			  CidrIp: 0.0.0.0/0
	Ec2Instance:
		Type: AWS::EC2::Instance
		Properties:
			InstanceType: t2.micro
			ImageId: ami-0732b62d310b80e97  # Amazon Linux AMI in ap-south-1
			UserData:
				'Fn::Base64':
				  !Sub  |
					#!/bin/bash
					yum -y update
					# install httpd webserver
					yum install -y httpd
					# start server
					service httpd start
					chkconfig httpd on
			SecurityGroups:
				- !Ref  MyEC2WebserverSecurityGroup
			Tags:
				- Key: Name
				  Value: My EC2 Instance
				- Key: Description
				  Value: Ec2 instance with webserver created from cloudformation
				- Key: Owner
				  Value: AWS learning
	Outputs:
		Website:
			Description: Website url of the ec2 instance
			Value: !Sub  'http://${Ec2Instance.PublicDnsName}'
		MyEC2InstancePublicIP:

			Description: Public ip of the ec2 instance
			Value: !GetAtt  Ec2Instance.PublicIp
		MyEC2InstanceInstanceId:
			Description: My ec2 instance id
			Value: !Ref  Ec2Instance
- In this configuration file we have specified the following -
- EC2 properties such as image id, instance type, security group, tags and the user data information
- The output tag to print the EC2 instance details in the CloudFormation console
Creating a Stack on AWS console
- Navigate to the AWS console with your credentials and go to AWS CloudFormation page
- On the homepage click on the Create Stack button and the following screen would appear. On this page click on
Upload a template filebutton and select the file in which you have the CloudFormation script
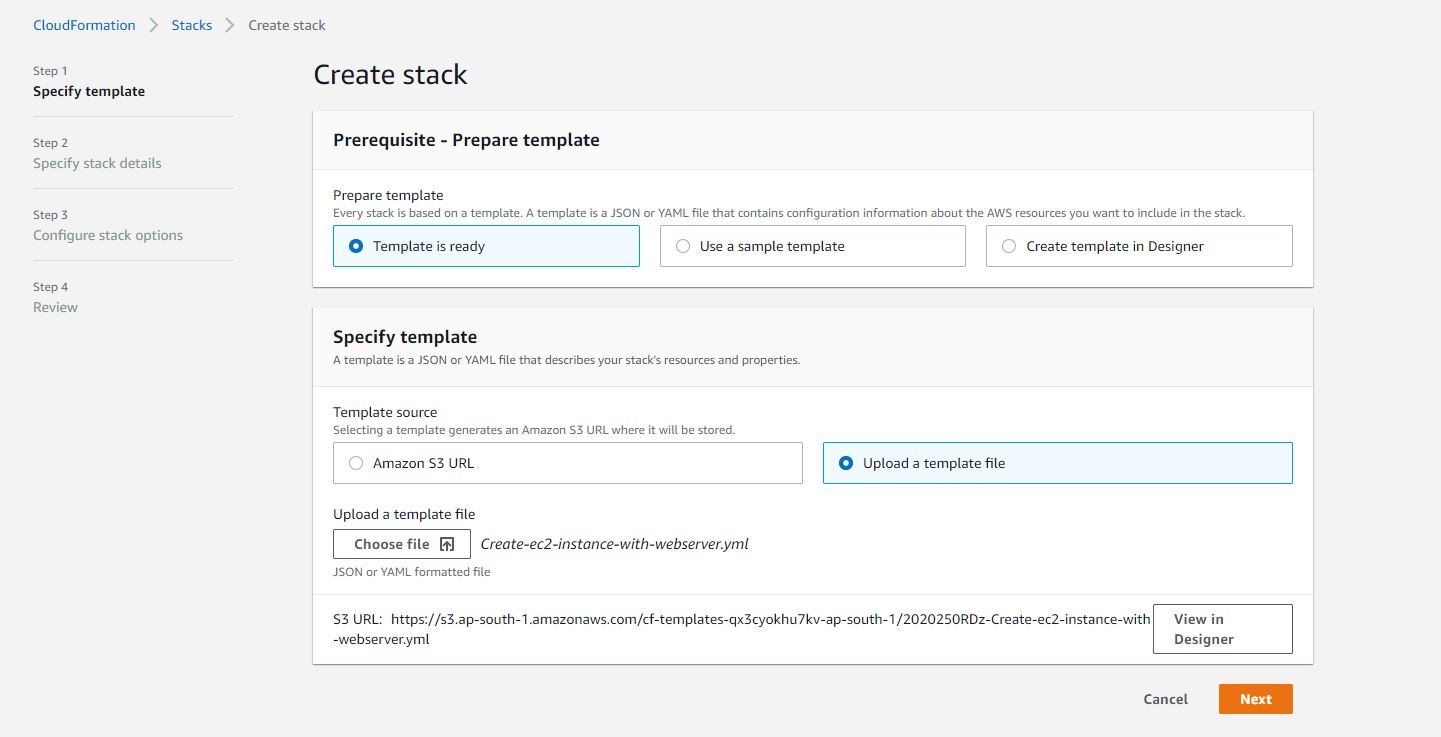
- Click
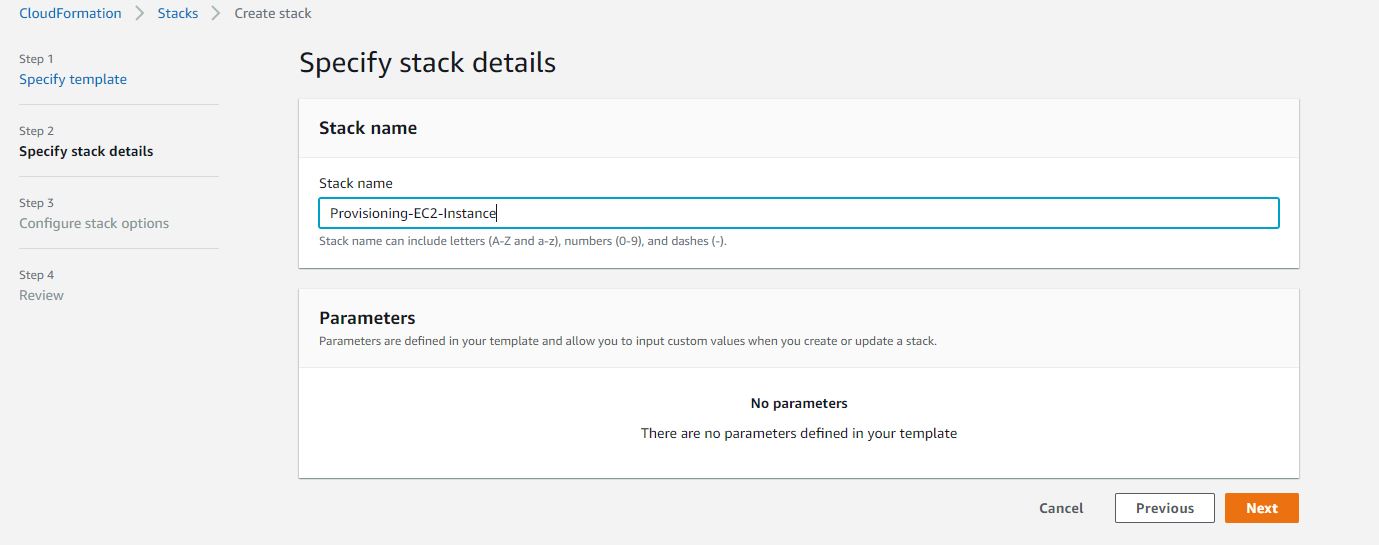
Nextand on this page enter the Stack name andNext
- On this step you are free add the tags (i.e. key-value pairs) to the stack. Add permission and can also configure the Advance options (such as Stack policy, Rollback configuration, Notification options, and Stack creation options). For simplicity keep everything as default and click
Next - Review the configuration such as Template, Stack details, Stack options, etc. If everything looks good click the
Create stackbutton and see the magic!
Reviewing the Stack Events on AWS Console
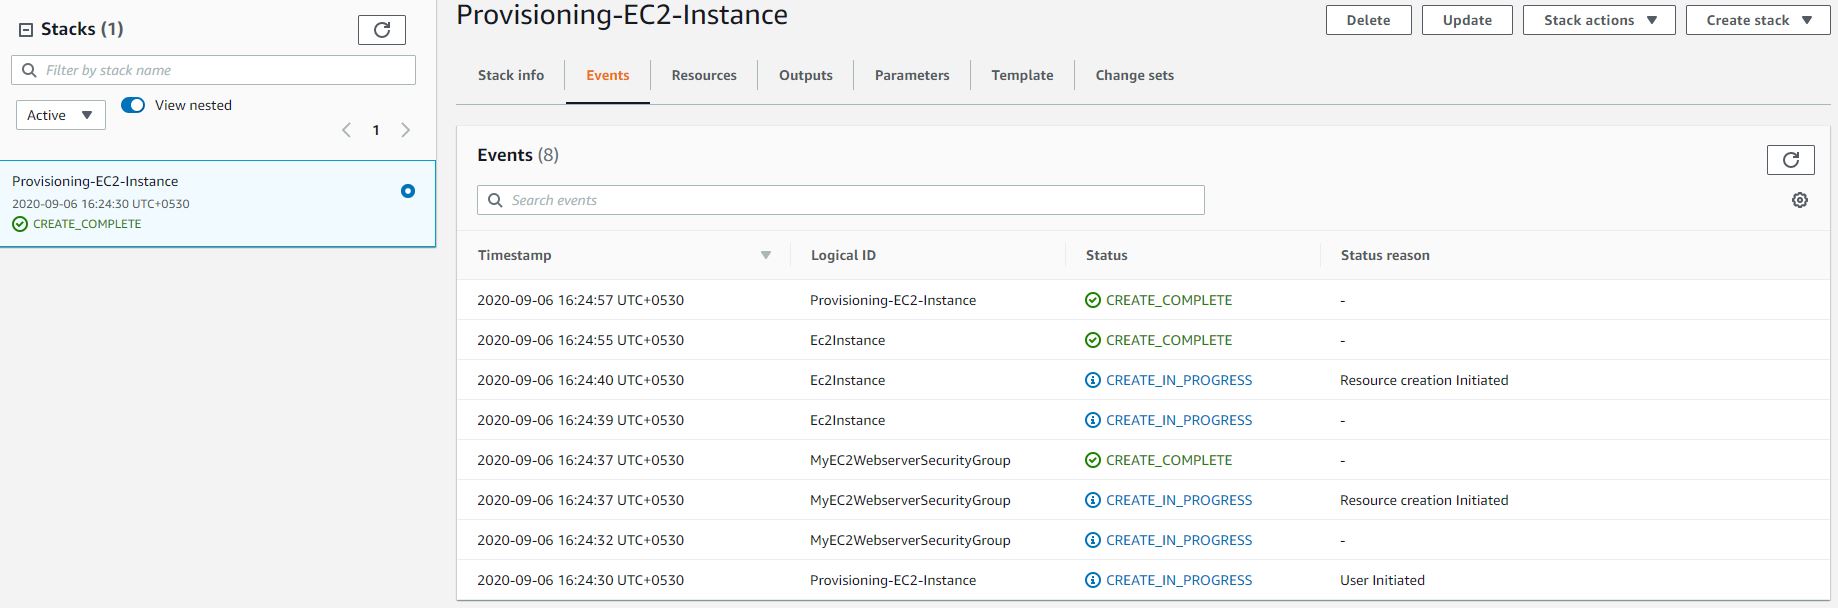
- Once you click the
Create stackbutton you will taken to the Stack Events tab where you can verify the events that took place for the creation of the AWS resource
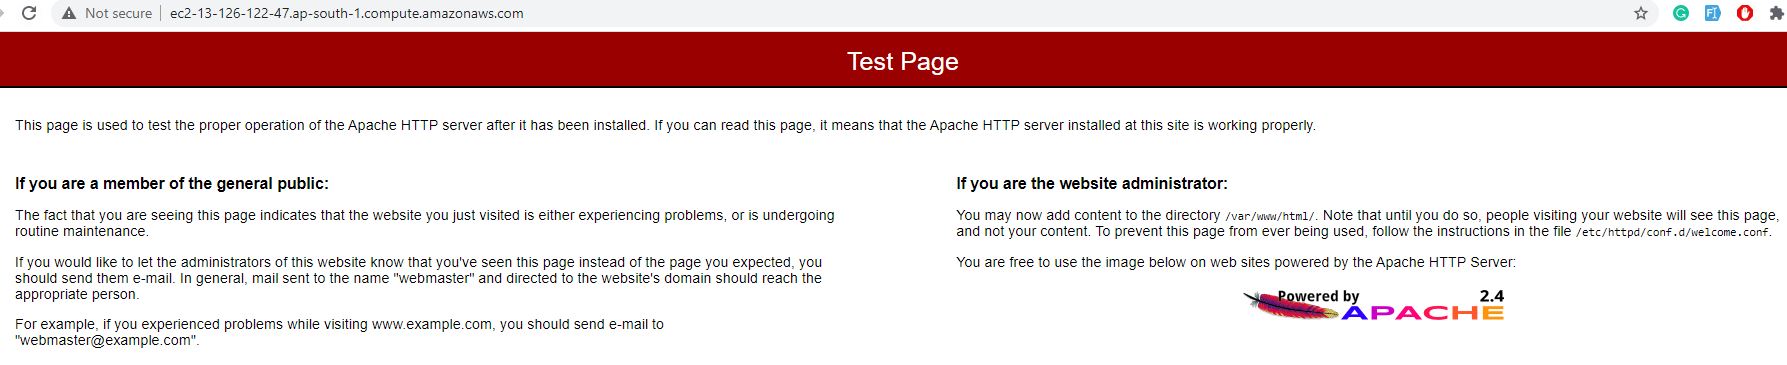
- Once all the events are successfully completed we will head over to the Stack Output tab to verify the result of your CloudFormation script. As here in the script we listed to display the Website information so the output will be shown as in Fig. 4.
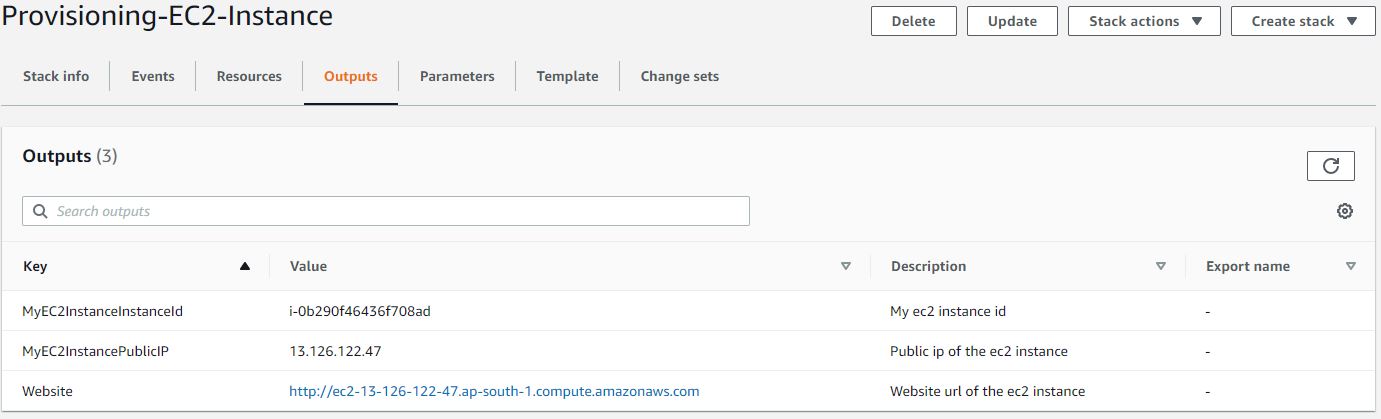
- Now click once the website link and the website should be available for user (remember we added the website configuration under UserData in the CF script)
Deleting the Stack & the AWS resources
- Once the learning is completed use the Delete button to delete the stack as well as the AWS resources provisioned by the CloudFormation script.
That is all for this page and I hope the article served you whatever you were looking for. Happy Learning and do not forget to share! And always remember to clear up the resources job the job is done.